Will post a further update once the controller is done and tested.
If i was to break the bed up into 3 sections of 20 hexagonal cells each section would have a effective resistance of 1/( (1/22) * 20) = 1.1 ohms
Each section of bed would draw @12volts 12/1.1= 10.1 amps of current at 100% duty cycle
but this could be cut back to 2.5 amps once running @25% duty cycle, this could be done with a capacitor charge pump circuit of some sort or i could break each section down further into two this would give me a sectional current draw of 5.05amps @ 100% duty cycle and 1.25amps @25% duty cycle.
if was to run the coils at 24volts (like the good test showed is required) the sectional current draw would be doubled. with 3 sections each drawing 20amps @24volts ( and each sub section drawing 10amps) if i was to turn them all on at once i would need 60Amps of current at 24volts, this is unreasonable. but if i stagger fire each subsection @100% Duty cycle then cut back to 25% duty cycle i would need 10amps then 2.5amps per sub section.
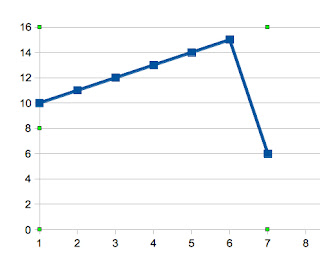
the current profile would look like this
@ 10% Duty Cycle
@ 25% Duty Cycle
at 25% duty cycle the overlap turns out to be quite high.. i would need a PSU that spits out 25Amps @24 volts.. this is closer to reality but still a bit too far off i think.. i guess i will have to see what ebay has to say about the price of fish.. if i can find a 24V psu that is cheaper than further complicating the controller i wil do that other wise i will have to break down the coils into even smaller groups..
UPDATE: -
actually i have made an error.. the curve will look like this
the previous chart didn't take in to account the fact that we will be turning off cells after they have been driven @25% this makes things much more manageable. I can probably stagger out firing order a little more and make the curve a little flatter but this will do for now.. 15Amps @ 24Volts can be had really cheaply thanks to Ebay. just found a buy it now 24volts 20amp PSU Delivered for $66Au Bargain. this PSU allows me to fire two sub sections at once, basically this will allow for upto 33% duty cycle and if managed correctly 100% startup/inrush current can be achieved, the plan will be to turn each coil on for 90% duty cycle for the first pulse and then .1s after that, as the cycle steps thru the first time each coil is energized it will actually be on for 100% for one cycle, 90% + 10% then after that they will be turned on for 10% of the time rotating between the 6 coil subsections i can manage 16.6% duty cycle without overlap. if overlap is used i can get 33.2% duty cycle before my PSU will start to complain.
worst case is that i end up with a nice 20Amp PSU for my printer. I was running the steppers off 24volts but got to tidying things up and switched back to 12volts..


No comments:
Post a Comment